My easy tarte tatin recipe, the French classic upside-down apple dessert to make at home. Discover what makes it so special: from its history and name, what pan, pastry and best apples to use, plus how to make the easiest caramel.
Well, it took me a few years, but I finally made your recipe: BRILLIANT result! Was perfectly sweet (not too much) and popped out like magic with the most perfect color! Thanks for the fab recipe, Jill! - Christina
What's the Key to a Good Tarte Tatin? What Is It?
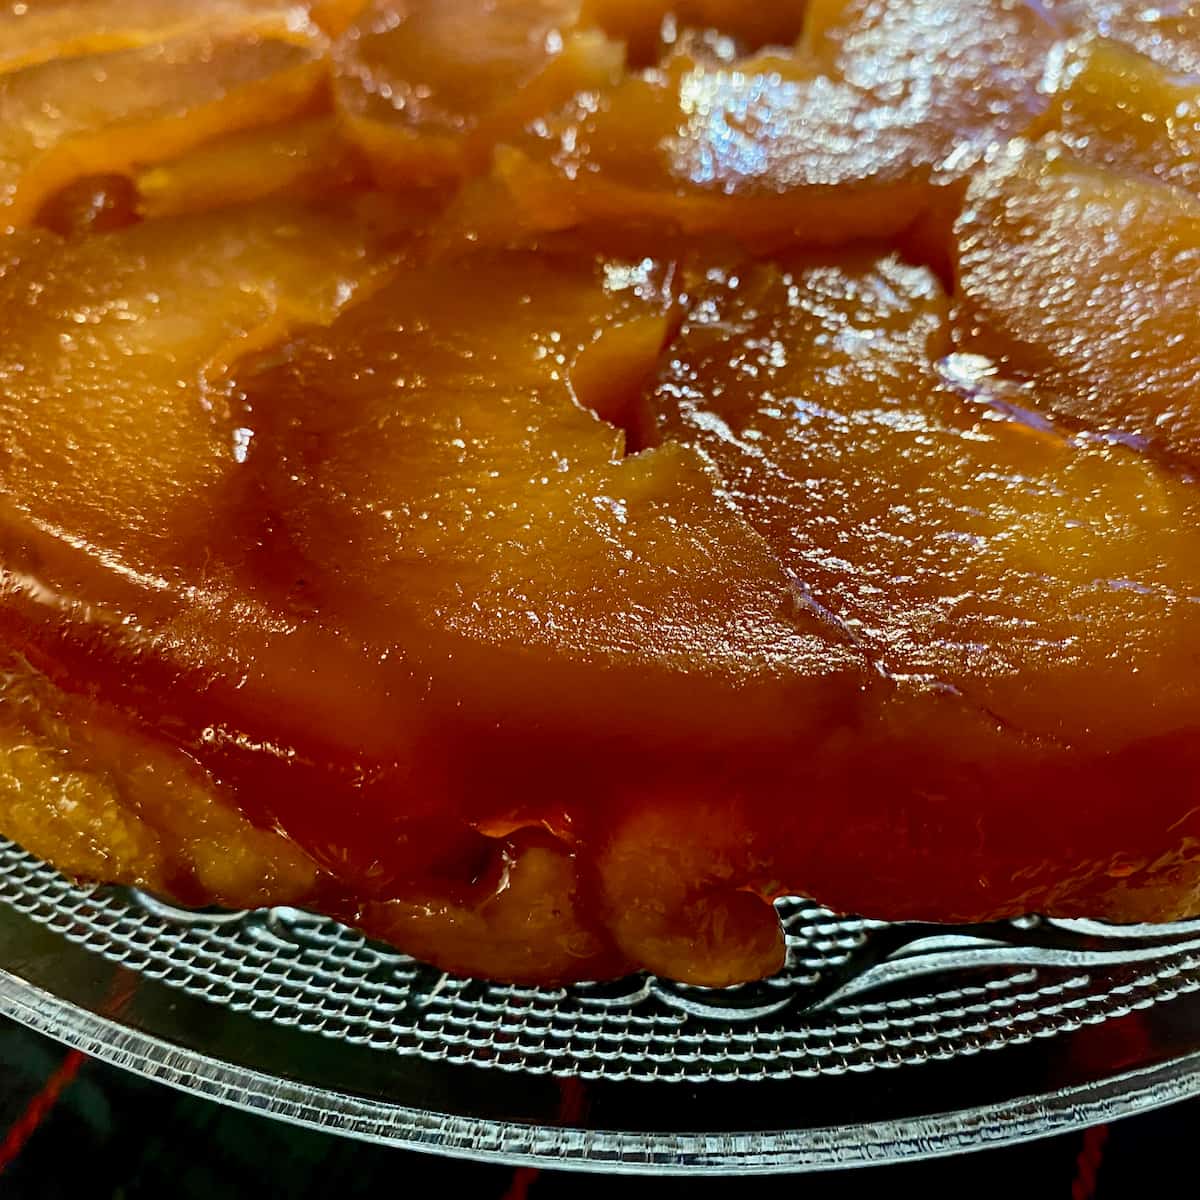
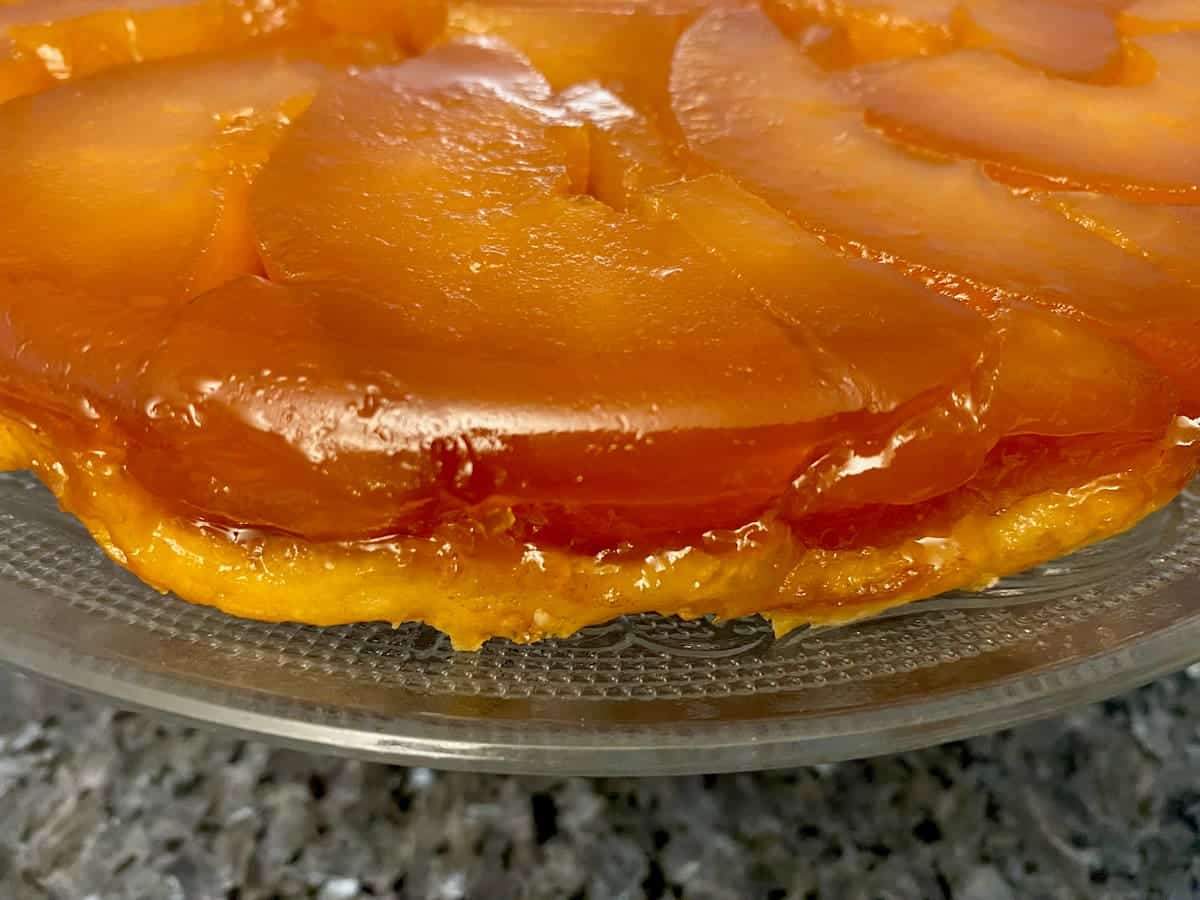
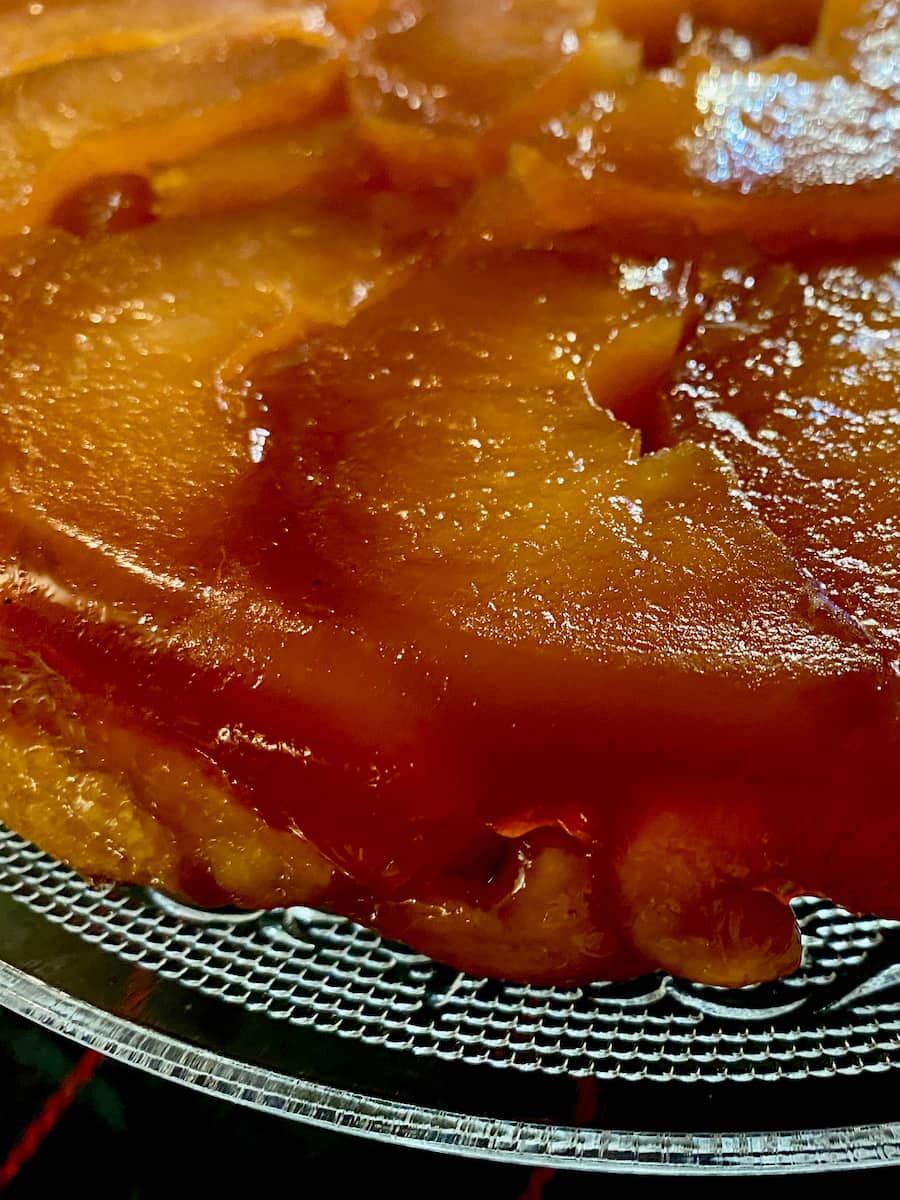
A good Tarte Tatin shows beautifully shiny, caramelised apples, served upside-down on a slightly crispy pastry crust. Apples are not sliced thinly but instead tightly packed in quarter chunks in a pan that have first been caramelised together. It's then covered in a layer of pastry and baked. When cool, the tart is then served after upturning the tin on to the plate and the thick apples just dissolve on the palate!
In France, it's one of these wonderful dessert stories that's just as delicious.
History of the French Tarte Tatin
According to Larousse Gastronomique (given as a wedding present as a young Scot about to embark in a French kitchen), the so-called 'Tarte Tatin' dessert, was first served in Paris at Maxim's.
However, it was the Tatin sisters, Stéphanie Marie (1838-1917) and Geneviève Caroline Tatin (1847-1911) who created a new dessert while making a 'tarte solognote'.
They came up with it quite by accident in the 1880s. While running their Hôtel Tatin in Lamotte-Beuvron, in the Sologne region, they were apparently so busy with clients at the front desk that they were often distracted.
I have two conflicting stories from many different cookbooks, but I prefer to stick with this one. As the apples were caramelising in sugar and butter in the oven for their tarte solognote, they either realised they'd forgotten the pastry or that they'd burned the apples, so they simply plopped the pastry on top, baked then flipped the tart upside down, and Mon Dieu, look what turned up?
From then on, it was served as "La Tarte de Mademoiselles Tatin" (mentioned in a local newspaper in 1889 according to 'On Va Déguster France' by François-Régis Gaudry). This tart was their speciality until they retired in 1906. They never called it a Tarte Tatin until it was renamed at Maxim's in Paris.
Best Apples for Tarte Tatin
Not all apples are ideally suited for a Tarte Tatin. Use good quality firm and tart apples - the best, for example, are Granny Smith, Chantecler, French Golden Delicious, Honeycrisp or Braeburn. I learned this the best way - by first getting it wrong.
Newly married, I was totally intimidated by my French Mother-in-Law's Tarte Tatin. Her dessert looked so sumptuous and grand with its glistening slices of warm caramelised apples sitting on top of a crispy pastry, just oozing with the sticky juices. How did she do it?
Pressing her short and simple recipe in my hand, I was assured it was easy and inrattable; "You can't go wrong," she said.
Well I did get it wrong.
For a start, I used apples that didn't survive the cooking process (Pink Lady). When I quickly turned the tin upside down for the grand finale de-moulding moment, some of the apples stuck to the bottom of the pan and the rest sat there miserably as light, uncaramelised mush. I thought of inventing a new Tart with Apple Sauce but somehow it didn't have quite the same "accident appeal" as that of the Tatin Sisters.
For much more on French apples, varieties and more recipes,
see my Market Page on Apples.
Classic Tarte Tatin - Best Pastry to Use
The authentic classic Tarte Tatin recipe uses shortcrust pastry (pâte brisée). Instead, I like to cheat to make this much quicker and easier using ready-made shortcrust. Best of all, I make this with puff pastry (better still with ready-made all-butter puff).
What is the Best Pan for an Apple Tarte Tatin?
For this recipe, for best results I use a deep 23cm x 6 (9 x 2 inch) round cake tin. Even better if it's non-stick, as there's no need to butter the dish in advance. There's no need to buy any special kind of tarte tatin dish. Some of my family make this in a skillet! As it's an upside down tart, I find a cake tin does the job perfectly.
(As I have an induction hob, alas, my cake pans cannot first be used on the hob, hence why this recipe is made first making a caramel to line the pan.)
Alternatively, use a good heavy-bottomed ovenproof pan. The most important is that the pan should be able to be transferred easily to the oven. This means that making the caramel can be done directly from start to finish in the pan and saves on washing up.
Easy Apple Tarte Tatin Recipe
To make tarte tatin at home, just follow these easy steps - see printable recipe card below.
To caramelise the apples, first make a caramel with water. This method is simply called a Wet Caramel and is so easy to make in just 10 minutes.
How to Make the Caramel
This method of wet caramel hardens but doesn't get too hard, which makes it so much easier to work with. It's the classic caramel used to make flans - see my recipe video for Crème Caramel, where I demonstrate how to make a wet caramel.
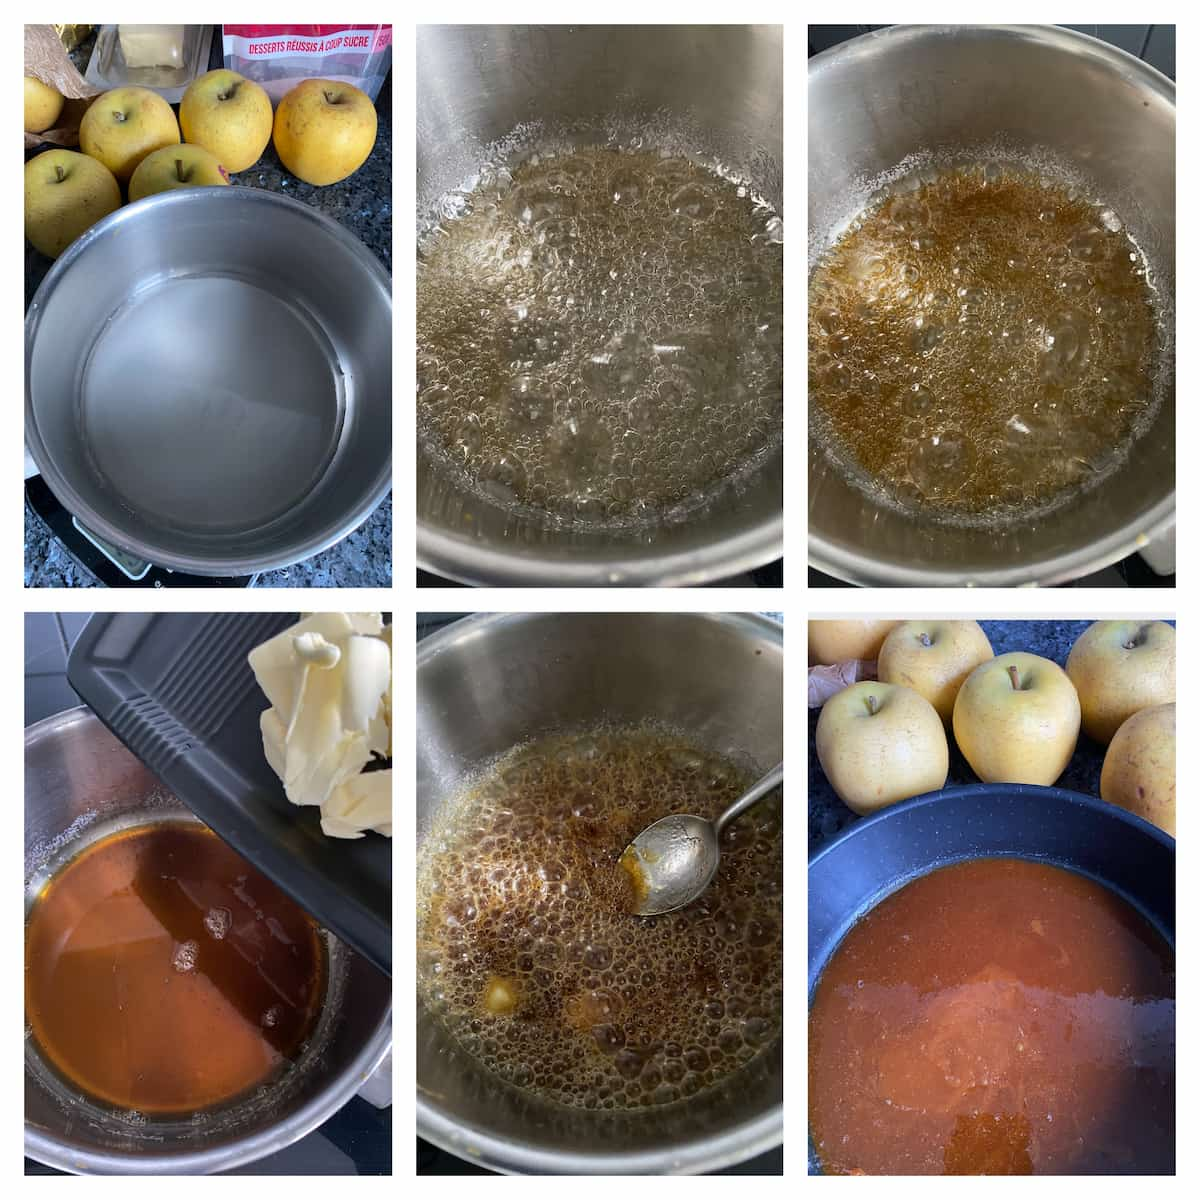
First, place about 3 tablespoons of water in a saucepan with 120g of sugar. It shouldn't be on the heat. Swirl it around or stir slightly to help dissolve them slightly.
Then place on a medium heat without touching or stirring. Leave the sugar and water to work their magic! Keep your eye on it, as it could easily burn if unattended.
Gradually, during 10 minutes, the bubbles turn from clear to light gold to golden brown. When golden brown, add the butter and salt then it's possible to stir with a spoon.
When the caramel is smooth, pour immediately into the cake tin and the caramel will solidify pretty quickly. This will make it easy to stack the apples on top of it.
Make an even easier wet caramel and use it in more desserts!
It's all in my new e-book with 35 recipes: Master Crème Caramel.
Prepare the Apples for the Tart Tatin
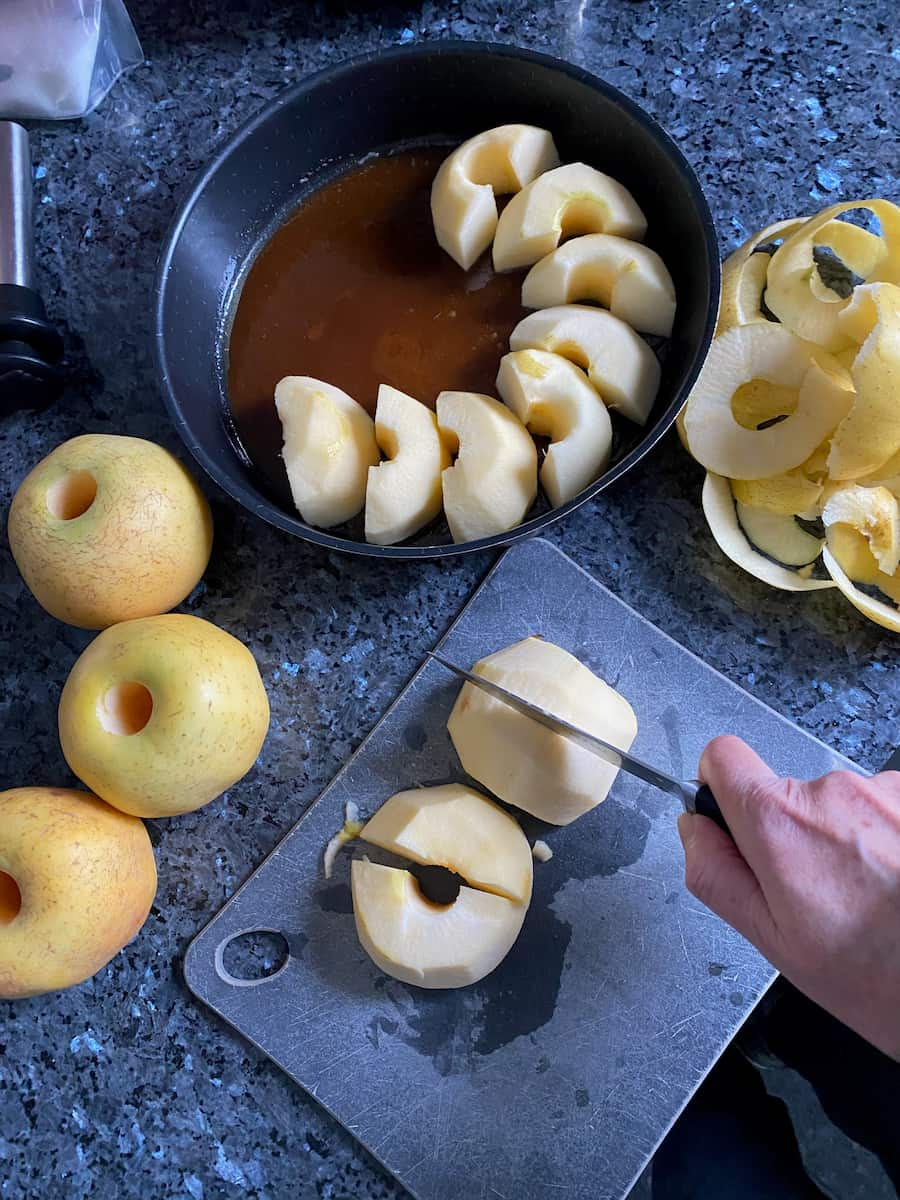
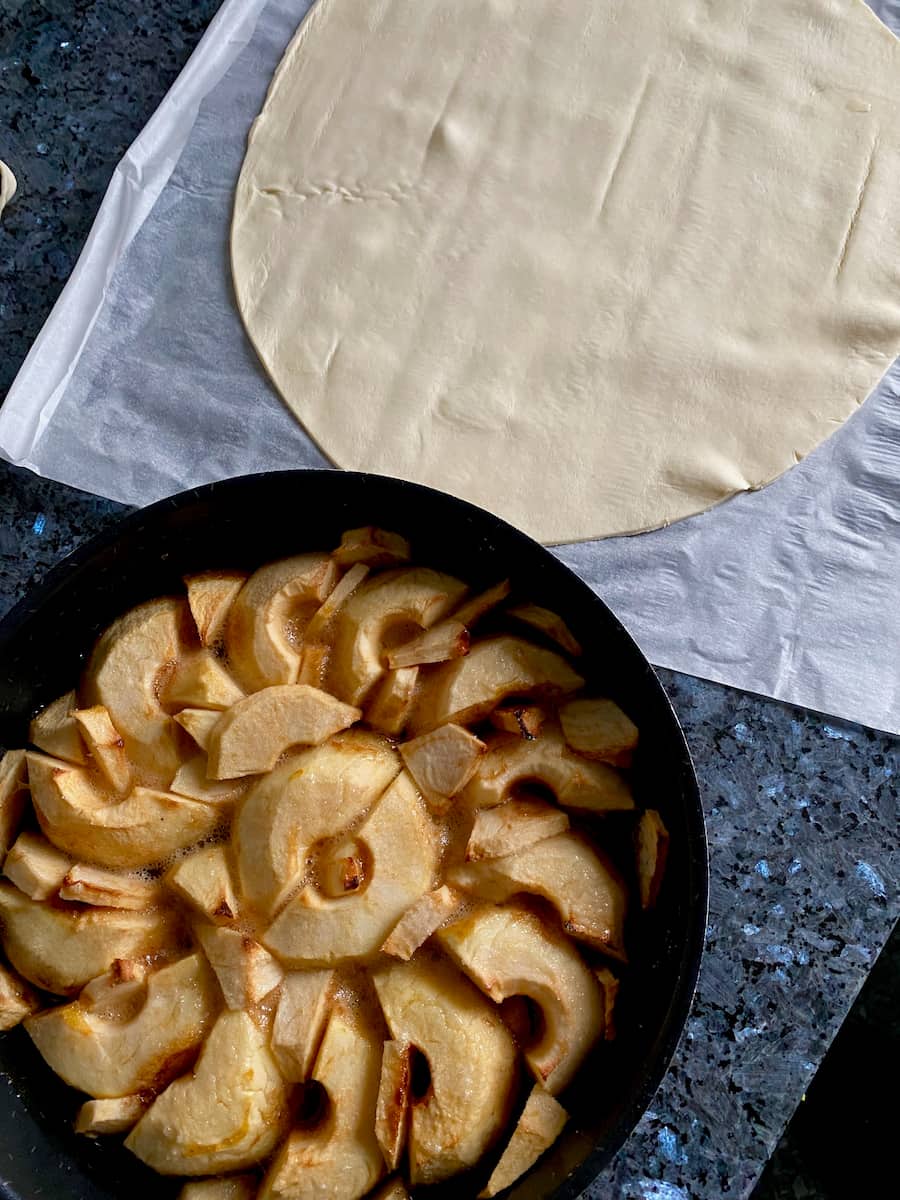
Once the caramel is poured into the tin, quickly prepare the apples so they don't brown too much.

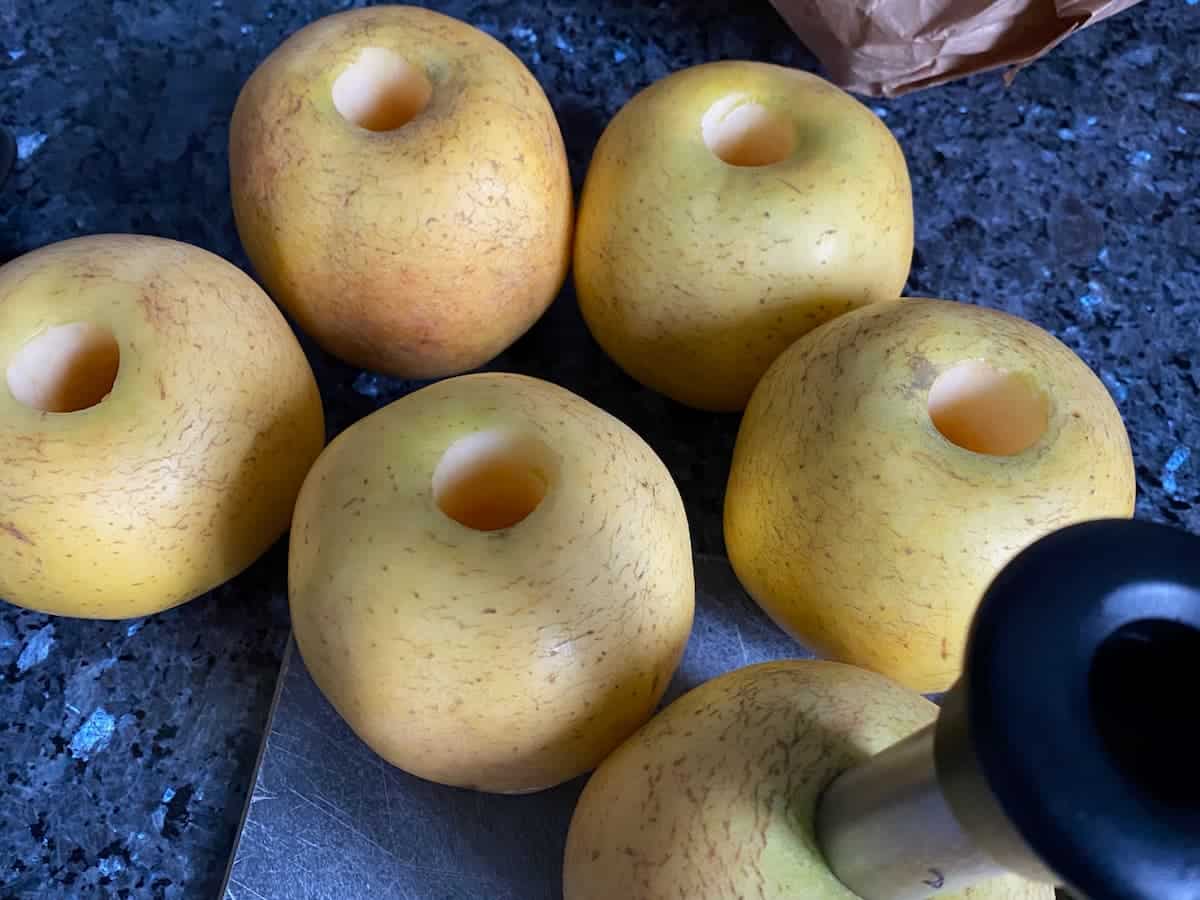
First cut apples in half and core them (I like to core them first with an apple corer, then half). Then cut them in half again horizontally. Pack them upright on top of the hardened caramel as close as possible together.
Fill in any gaps with leftover apple bits then top evenly with the extra butter and sugar and bake for at least 30 minutes to caramelise the apples in the oven.
Remove then top with the circle of puff pastry. Pierce some holes to let air escape then bake further in the oven for another 20 minutes or longer if you prefer the apples darker.
Leave to cool for about an hour. Loosen the pastry by running a knife around the side of the pan then upturn on to a dish.
Some Common Tarte Tatin Mistakes
Who doesn't love a bit of baking chat about soggy bottoms? Don't worry - Tarte Tatin will always have a little juice from the apples, and that's perfectly normal.
That said, here are some common pitfalls to avoid:
- Caramel not cooked enough - If it's too pale, the flavour will be flat. Aim for a deep amber before pouring into the cake tin.
- Using the wrong tin - Never use a loose-bottomed tin, or the caramel will escape. A sturdy, solid cake tin is essential.
- Choosing the wrong apples - Soft, watery varieties (Pink Lady, Gala) collapse into mush. Use firm apples like Granny Smith, Braeburn, or Reine des Reinettes.
- Cutting apples too thinly - Always use chunky quarters or eighths. Thin slices disintegrate and won't give that signature layered look.
- Adding pastry too soon - If you prepare the caramel and apples in advance, let them cool completely before topping with pastry, or it will go soggy.
- Unmoulding at the wrong time - After baking, rest 10-15 minutes. Flip too soon and the caramel will be too runny; wait too long and it risks sticking.

French Apple Tarte Tatin vs Scottish
Speaking of the Auld Alliance between France and Scotland, I have a couple of Scottish cookbooks that call this an Auld Alliance Apple Tart! Do you think Mary Queen of Scots brought this to France before the Tatin sisters? Hm. If you know of the Scottish roots of this dessert, then please let me know in the comments below.
Should It Be Served Hot or Cold?
The Tarte tatin is best served warm or at room temperature, rather than hot or cold. We love it served just on its own, but many restaurants in Paris accompany it with a spoonful of full fat crème frâiche. Can't find crème frâiche? The best alternative is Greek yogurt.
For something different, serve with this boozy Calvados Cream or Drambuie ice cream for a Scottish-French dessert.
For comforting desserts, see more seasonal winter recipes.

Tarte Tatin Recipe
Equipment
Ingredients
- 5-6 apples Golden Delicious or Granny Smith
- 200 g (7oz) ready-made puff pastry thawed, if frozen and rolled out
- 3 tablespoon water
- 120 g (4½oz/ ⅔ cup) granulated sugar plus 2 tablespoon for sprinkling
- 30 g (1oz/2 tbsp) unsalted butter plus 15g/1 tablespoon extra
- 15 g (1 tbsp) Calvados (optional)
- pinch salt (fleur de sel, Maldon or Celtic sea salt)
Instructions
- In a heavy bottomed saucepan, stir the water and sugar together until slightly dissolved (off the heat). Then, over a medium heat, leave the sugar alone to bubble and simmer until a light golden brown caramel forms (no need to stir at all until the caramel turns colour). This will take about 10 minutes.Stir in the butter (and salt if using) and splash of Calvados (if using) until the caramel is smooth and immediately pour into the cake tin.
- Preheat the oven to 190°C/375°F (170°C fan/gas 5). Peel the apples, cut them in half, remove the cores with a sharp knife (or use an apple corer) and cut them again horizontally.
- Arrange the apples upright in a circle and pack them as tight as you can (they'll shrink while cooking), filling as much space as possible in the middle. Cut up any leftover apple and stuff them into the spaces.Top evenly with the extra butter cut into small bits (or brush with melted butter) and lightly sprinkle over the extra 2 tablespoons of sugar. Bake in the oven for 30 minutes.
- Remove the caramelised apples from the oven to cool slightly as you prepare the pastry.
- Ideally your puff is ready rolled so there's no need to do anything. (If the puff pastry is in a block, roll it out to about 2mm thickness and cut out a 10-inch circle - that's slightly larger (2-3cm) than the size of the pan you're using. Place the puff pastry sheet on top of the apples, tuck in the sides as far down the edges as you can, as it will neatly hold the apples when turned over at the end. Pierce a few small holes in the pastry to allow any steam to escape - this will prevent the puff pastry from puffing up too much while baking.
- Bake in the oven for a further 25-30 minutes (another 5 minutes if you like your apples darker), or until the pastry is golden brown and the apple juices bubble around the edges.
- Leave to cool for about an hour then run a knife along the edges just to help release the sticky beauty. To turn over the tart, cover the pan with a large deep plate (to catch any juices). Hold the pan and plate together and flip upside down quickly, pastry side down.
Notes
Serve either at room temperature or slightly warmed with a dollop of good quality (full fat) crème fraîche or vanilla ice cream. Alternatively, add some Calvados Cream or for something different, Drambuie ice cream for a boozy, adult dessert. For more on apple varieties for baking, see the guide to apples.
This recipe was first published 8 October 2015 but is now completely updated.
Make an even easier wet caramel and use it in more desserts!
It's all in my new e-book with 35 recipes: Master Crème Caramel.


Antonia
A great recipe for tarte tatin - quick, easy and foolproof as long as you don't crystallize the caramel (which I have done - but you can always throw out the bad batch, as I did, and start again). This recipe was the first I used for this dessert and I have returned to it with relief after combing through multiple others which have me standing over the stove caramelizing the apples by hand.
Jill Colonna
Thanks, Antonia - so pleased you find this tatin recipe foolproof and helpful. Shame on the first caramel but sounds like you've got it to a fine art now. There's a whole section on how to make caramel in my e-book, Master Crème Caramel if you're interested. Bon dimanche!
Brianna
Hello Jill,
Love the recipe. I gotta take the caramel further next time but that’s my fault on that. I added a vanilla bean, black pepper (my go to for fruit desserts) and thyme and waiting for it to cool now.
I hardly ever comment on recipes but this one deserves the comment and praise.
À bientot,
Chef Brianna medlin
Jill Colonna
Bonjour Brianna,
You've no idea how happy I am to read you love this recipe - thank you, chef! Your tarte tatin with thyme and black pepper sounds intriguing along with the classic apple and vanilla. I wish I could pop in and taste. Merci encore, Jill x
Emma
Great recipe. Thank you for making it so easy with your clear step by step instructions. Will definitely be making again.
Jill Colonna
So happy to hear this Emma - thanks so much! Here's to a wonderful season of apple desserts on the horizon.
Christina Conte
Well, it took me a few years, but I finally made your recipe: BRILLIANT result! Was perfectly sweet (not too much) and popped out like magic with the most perfect color!
Thanks for the fab recipe, Jill!
Jill Colonna
So happy to hear this, Christina. It's hard to dose sweet caramel without being too sweet and so this is an extra bonus to hear you like that too.