Simple canelé recipe (also known as Cannelés) without beeswax. Made with simple ingredients, discover how to make them like the famous ones in Bordeaux.
Another success Jill. These are just delightful. We decided we preferred them dark and really caramelised on the outside. My other half said they were like the perfect chip, crispy on the outside and lovely and soft in the middle. - Denny
Canelés - How did they Originate?
I love the stories behind French cakes and canelés, being from Bordeaux, were linked to wine-making. As egg whites were used to clarify French Bordeaux wines, the local nuns of the Couvent des Annonciades saved the yolks and with them invented canelas in the 18th century. Since Bordeaux was a major port, rum just happened to be handy, along with tropical vanilla.
Over the years these vanilla and rum cakes took on various different looks and names around the Aquitaine region, such as canole and canauliers.
Is it Canelé or Cannelé?
Even the French are often confused how to spell this cake: both canelé and cannelé de Bordeaux are used. As both spellings are still official, they're interchangeable.
As of 1985, one 'n' was officially dropped by the Confrérie de Canelés de Bordeaux (Brotherhood of Canelés). In French gourmet culture, there's even a formal protective clan for them.
You'll find both spellings in famous pâtisseries or bakeries around Bordeaux (Lemoine, Baillardran, Luc Dorin, La Toque Cuivrée, San Nicolas) and the rest of France.
How do you pronounce canelé?
It's the same for both spellings: "can-eu-lay".
Note that their name shouldn't be confused with the French word for cinnamon, which is cannelle (pronounced 'kan-nelle').

What Makes a Cannelé So Unique?
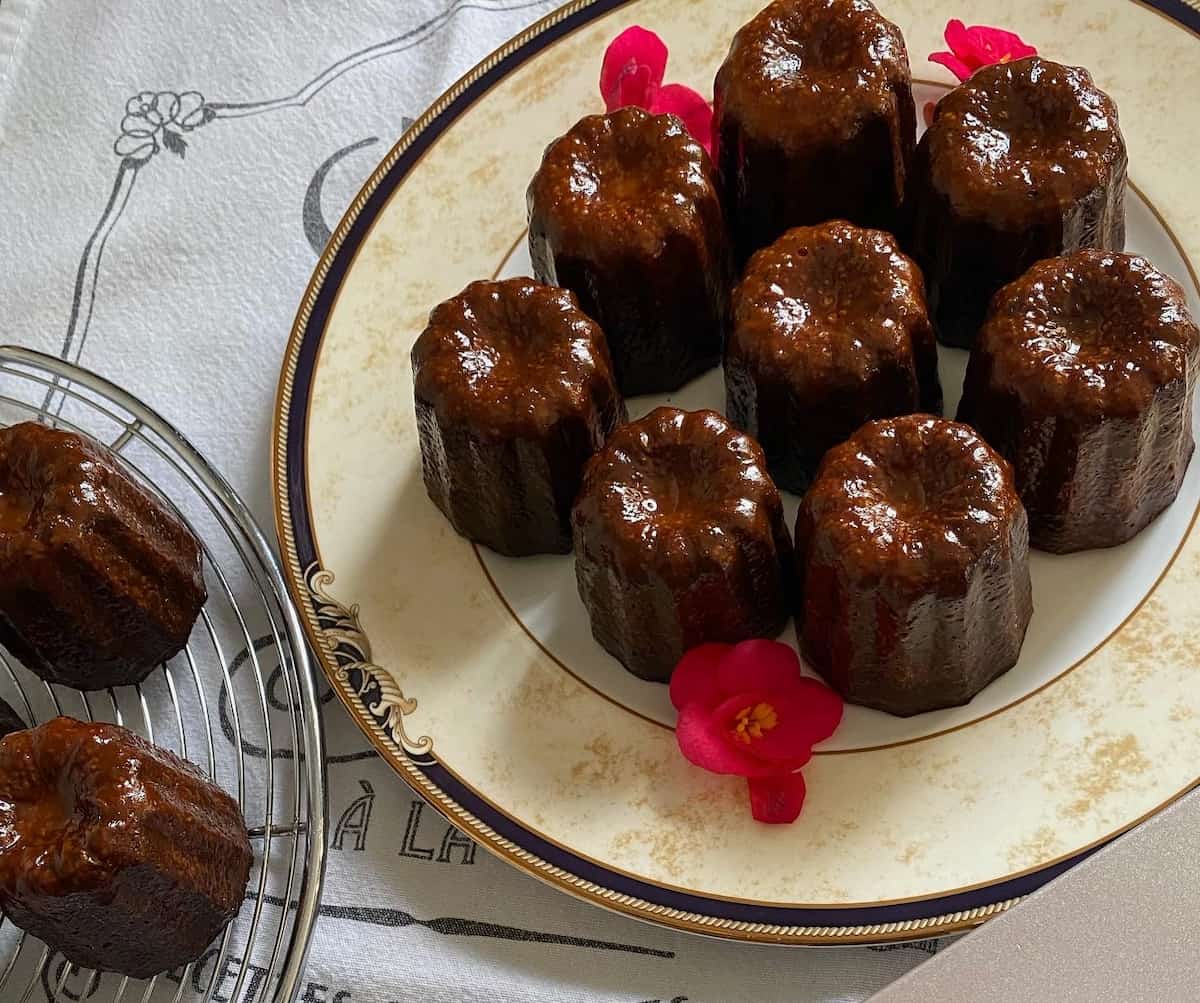
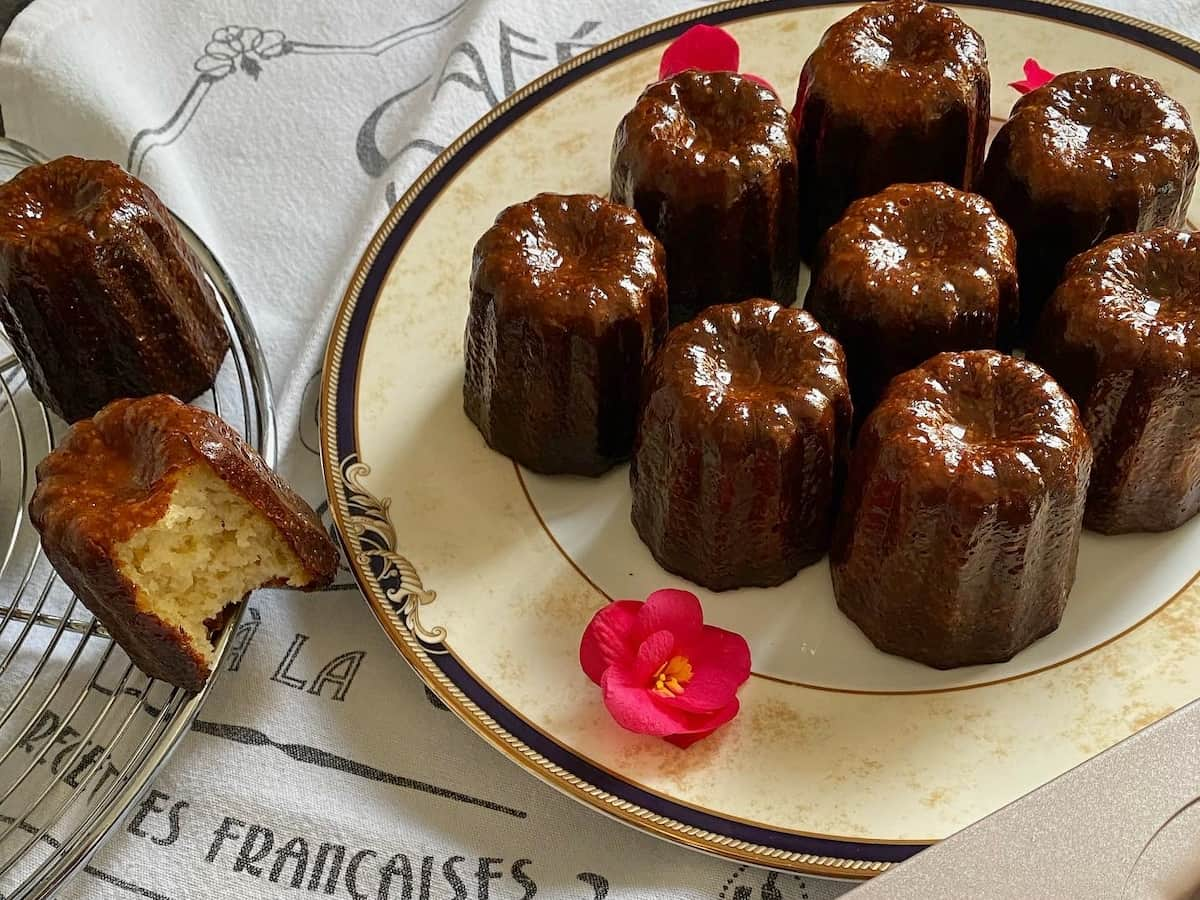
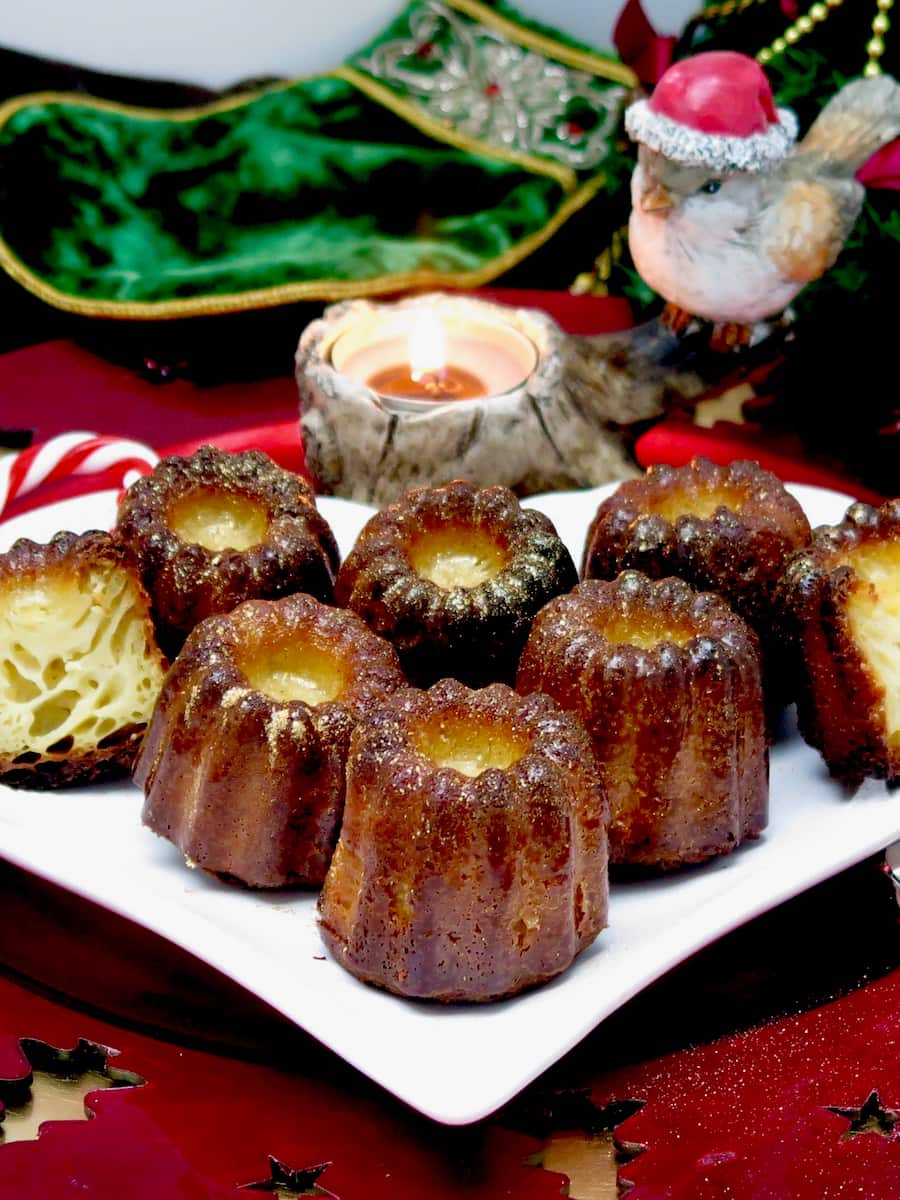
As cakes go, cannelés are pretty unique with their accordian-style fluted shape. They have an extra dark, caramelised crispy exterior while the soft interior is bright, custard yellow, airy and spongy firm.
In the taste department, they're traditionally made with good vanilla pods/beans and dark rum, which enhances vanilla's flavour further. Canelés are just not the same without rum.
Canelé Ingredients
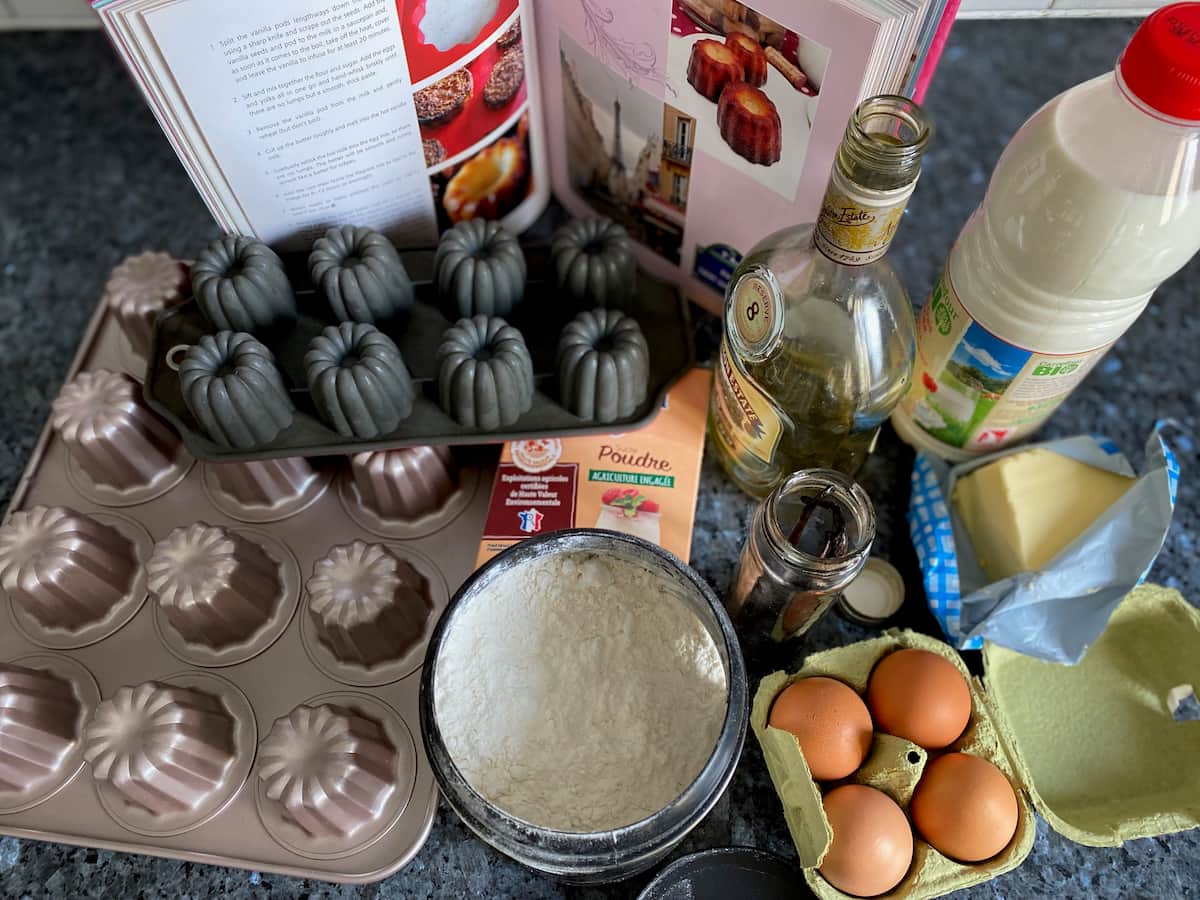
The canelé is made with a few basic ingredients: whole milk, plain flour, organic eggs, egg yolks, vanilla, sugar, French butter and rum.
If you want your cannelés to taste like the ones in the bakers in Bordeaux, make them with good vanilla pods/beans.
If you can't find good pods or beans, use vanilla powder or paste or a top quality vanilla extract. Never use aromas: they're synthetic and the resulting flavour really disappointing.
Get my tip how to store vanilla beans/pods and make them extra sticky
All in my recipe post for Confiture de Lait and How to Store Vanilla Beans.
What Rum to Use for Canelés?
Like quality vanilla, the best canelés use the best quality dark rum.
I've made this many times with regular white rum. Although little is used, cheaper clear rum just doesn't give the cakes the same depth of flavour as with darker rum. So, the higher the quality, the better - budget permitting, to get that crispy caramelised flavour and texture.
Can I Make Them Without Rum?
Even although you can make canelés without the rum (using more milk), the taste isn't nearly the same - it's best with rum. Besides, the oven temperature is so hot that the alcohol disappears but leaves a beautiful flavour.
Love rum in cakes? Then make this French Almond Cake (le Saint Germain) or a traditional Galette des Rois.
Simple Canelé Recipe (Without Beeswax or Copper Moulds)
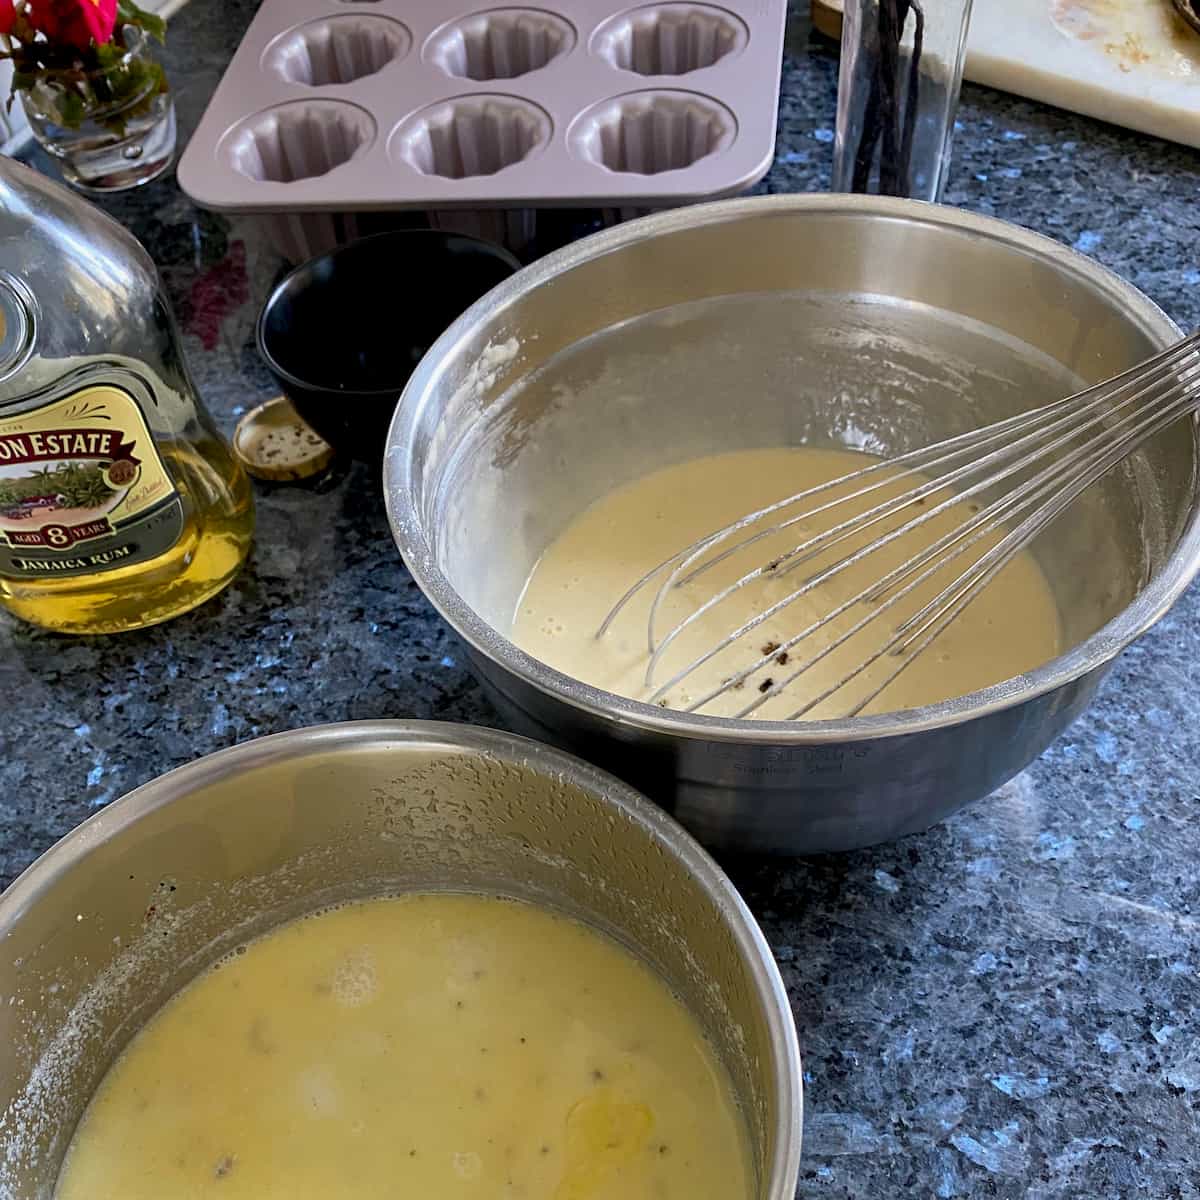
The canelé batter is best made the day before. Vanilla pods/beans (or powder) are heated and infused in whole milk then butter is melted in.
Meanwhile, in another bowl, eggs and yolks are whisked together with the flour.
To avoid any lumps (like the method for crêpes), the buttery vanilla milk is gradually added to the flour and egg mix. Once whisked until smooth, it's covered and left in the fridge overnight.
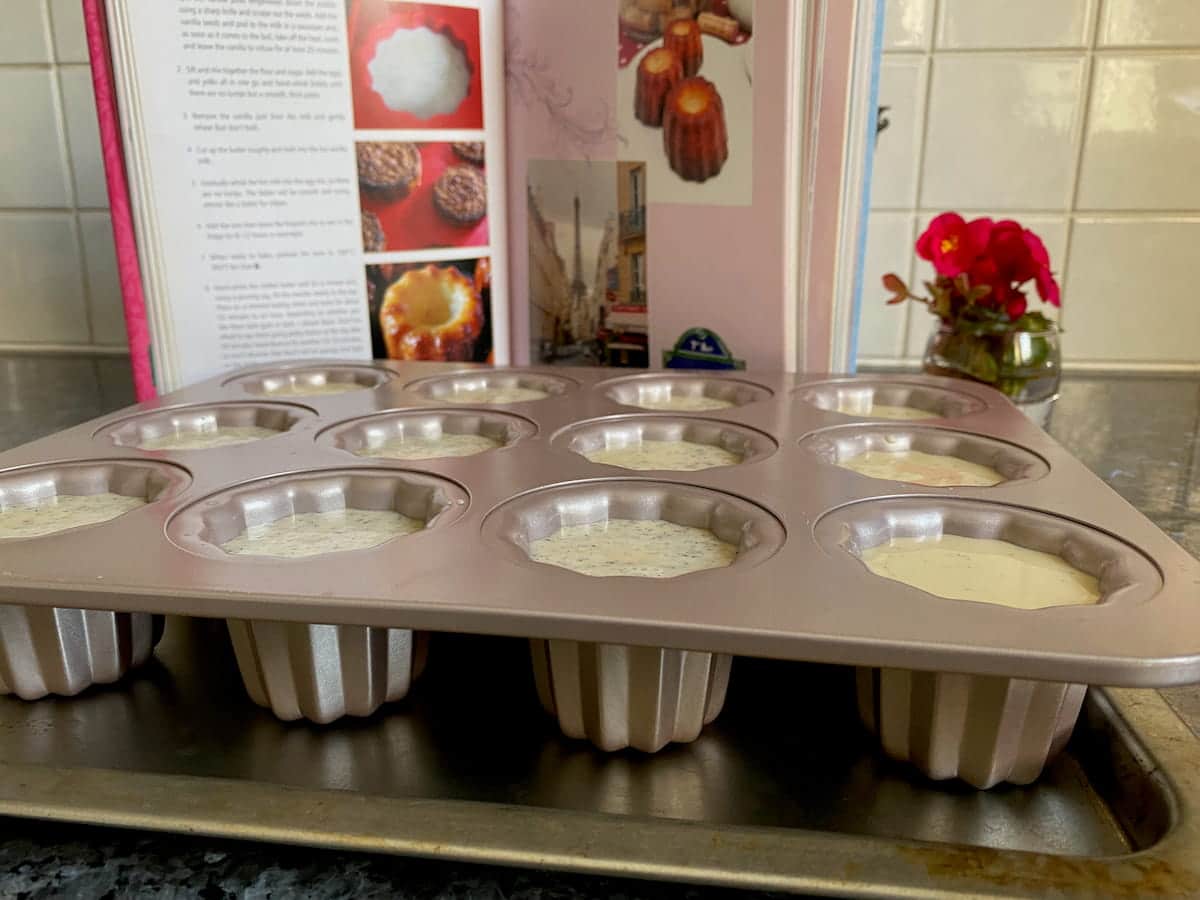
Next day, it's just a matter of whisking the batter all together again (there's a film or thin butter layer that forms which is normal) and pour into the moulds. Bake for about an hour, depending on the size of your tins. See the full recipe in the card below.
Cannelés Moulds - What's Best?
Traditionally, canelés are baked in copper moulds brushed with beeswax. Pastry chefs swear by it, but let's be honest: beeswax can be messy, and copper molds cost a fortune. But there are a variety of pans that work well.
Non-stick metallic or silicone moulds are great without beeswax. While a silicone mold may not feel as "pro" as copper, it's more affordable than expensive copper moulds, easy to clean, and gives excellent results if you bake them long enough. More recently, I've switched to non-stick steel molds. They're slightly larger and can take the high temperature, so I bake them for about 1 hour 15 minutes.
Shape also matters: some moulds have a deeper hollow at the top, leaving a lighter centre, while others are straighter for a more even, darker finish. In the end, it all comes down to preference - extra dark or just a shade less.
While you could use a muffin pan, for best results make canelés in their traditional tins.
Whatever you do, avoid cooking spray; spraying moulds with non-stick oil is not healthy and won't do your tins any favours.
Cannelés - Troubleshooting
Follow the recipe below (extract from my book) to the letter and there should be no problems. However, here are a few tips to help troubleshoot canelés.
- If they come out too golden, they are not ready yet. Don't be afraid to take them out of the oven to check them until they look quite dark.
- They're warm and gooey inside. The cannelés have either not been cooked enough and/or not left to thoroughly cool and set.
- They stick to the moulds. I thoroughly recommend using non-stick metallic moulds (see below), now easy to find on the internet and in baking stores. They will easily slip out of the moulds no problem with this canelé recipe without beeswax.
How do you Eat Canelés?
Canelés are best served at room temperature and enjoyed mainly at teatime with tea, coffee or French hot chocolate. For tea amateurs, serve with a Ceylon or Keemun tea to accompany the custardy, caramelised flavours of the vanilla and rum.
They also make a great teatime treat during the holiday season.
How to Keep Them Crispy
It's best to eat canelés crisp fresh on the day but store them at room temperature in an open box, avoiding the fridge. If sealed in an airtight container, their texture becomes spongy, losing that thick caramelized crust. If need be, cover loosely in foil. Honestly, ours find it already a challenge to get past the cooling rack!
How to Use the Leftover Whites
To use up the leftover two egg whites, make:
- Coconut Macaroons (rochers coco)
- Financiers (French almond cakes)
- Tuiles
This canelé recipe also makes ideal festive food gifts. For more recipes using yolks, see all my egg yolk recipes.
Canelé Recipe (Cannelés de Bordeaux)
Equipment
- metallic canelé moulds (non-stick)
Ingredients
- 2 vanilla pods/beans (see NOTES)
- 500 ml (18 fl oz/2 cups) whole milk
- 120 g (5½oz/1 cup) plain flour (all-purpose)
- 200 g (7oz/1 cup) sugar
- 2 eggs organic
- 2 egg yolks organic
- 50 g (2oz/ 3 tbsp) butter unsalted
- 3 tablespoon dark rum
- pinch salt
Instructions
The Day Before (or 8 hours before baking)
- Split the vanilla beans/pods lengthways down the middle using a sharp knife and scrape out the seeds. Add the seeds and pod to the milk in a saucepan and, as soon as it comes to the boil, take off the heat. Cover and leave the vanilla to infuse for at least 20 minutes.
- Sift and mix together the flour, sugar and salt. Add the eggs and yolks all in one go and hand-whisk briskly until there are no lumps but a smooth, thick paste.
- Remove the vanilla pod from the milk and gently reheat (but don't boil).
- Cut up the butter roughly and melt into the hot vanilla milk.
- Gradually whisk the hot milk mixture into the egg mix, so there are no lumps. The batter will be smooth and runny, almost like a batter for crêpes.
- Add the rum then leave the batter to rest covered in the fridge for 8-12 hours or overnight.
Next Day
- When ready to bake, preheat the oven to 200°C/400°F (180°C fan/Gas 6).
- Hand-whisk the chilled batter well for a minute (or gently heat briefly for 30 seconds in the microwave) and, using a pouring jug (jar or recipient with a spout), fill the moulds nearly to the top. Place on a rimmed baking sheet and bake for about 50-60 minutes (or more for regular sized moulds) depending on whether you like them dark gold or dark - almost black. Don't be afraid to see them going pretty brown at the top after 40 minutes; leave them in for another 10-15 minutes, as you'll discover that they'll still be spongy yet firm and light on the inside.
- Turn the canelés out of the moulds straight away and leave to cool completely on a wire rack.


Fernando
Hello Jill. Here writing from Lima- Peru,?. I used almost your same recipe, but with different temperatures, 250 C for 12 minutes and them 40 minutes at 180. However, I always have a same result, the canelé has a hole on the top ( later unmold will be the bottom) . I have some batch to put in the oven at 180 C to see what happen ?
Jill Colonna
Hello Fernando,
Why are you trying to change the temperatures? I'd suggest you stick with the 200°C for at least 50 minutes like I say in the recipe and if they need longer, bake for longer? It's so much simpler sticking to the same recipe, tbh.
Brenda
I used this recipe to make canelés for the first time. They were a hit! Thanks for such clear and concise recipes!
Jill Colonna
So happy to hear this, Brenda - and first time too. Here's to many more canelés and a delicious Christmas!
Denny
Another success Jill. These are just delightful. We decided we preferred them dark and really caramelised on the outside. My other half said they were like the perfect chip, crispy on the outside and lovely and soft in the middle. You have to excuse him ?
Denny (I remembered the stars)
Jill Colonna
So thrilled you loved them also the extra dark and caramelised way. These are the best! Thanks for your feedback, Denny x
Lisa
I had these in Paris last summer! So glad I found your recipe! They turned out perfectly! Merci!
Jill Colonna
Thrilled to hear that, Lisa. Hope they'll make you think of your next trip to France!
Thomasina
Just tasted these. I love them. Thank you Jill.
Jill Colonna
So glad you love them!
Christina Conte
This is THE recipe! Thanks, Jill! Have the copper tins and all! Yours look absolutely gorgeous!
Jill Colonna
Thanks Christina - gosh, you've got the copper! Well have fun making them even more. I ended up not getting the copper as didn't have a copper, haha. No, seriously am happy with the good sturdy silicone and non-stick metallic pans I have.